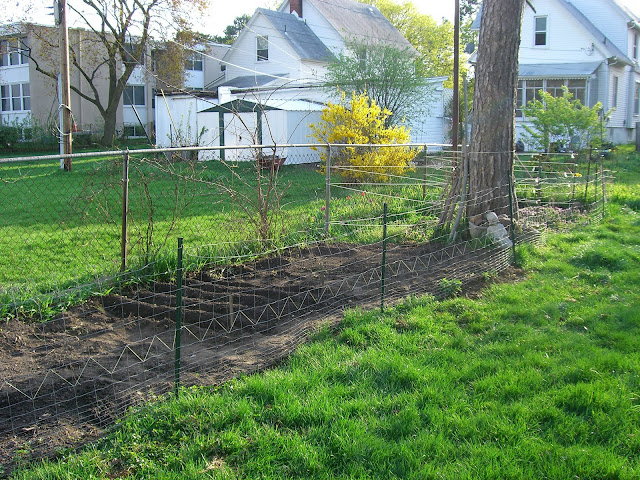
From what I understand, organic gardening is really all about the quality of the soil, and when it comes to our garden, the soil is our biggest challenge. Clay soil abounds in urban gardens in this county and our yard is no exception. The dirt is heavy, mostly lifeless, and full of large-ish rocks and walnut shells from the Black Walnut tree in our yard. Black Walnuts are an amazing thing to have at your disposal, if you have the motivation to harvest them and crack them open, but after struggling with our tomatoes, we found out that walnut shells contain juglone, which is poisonous to tomatoes and many other plants. The largest concentrations of the toxic substance are in the nut hulls, roots, and buds, so even though our garden is not directly under the tree, our plants are still susceptible because the squirrels carry those walnuts around everywhere and like to drop them into the garden for safe keeping (jerks).
One day while David was working in the garden last summer, the woman who owns many of the properties around us came out and chatted about the history of the area. He asked her what the deal was with the random rusty pole that's still standing in the middle of our garden because we've been finding huge rusty nails and other ancient-looking metal objects while digging around. She told us that the pole is all that is left of the Martin house her grandfather had in his yard many many years ago.
Over the years, property lines changed and the giant bird house came to be on the other side of the line than her area of ownership so it went into disrepair. Since our house was built in 1920, I'm sure there is lead in those pieces of the past, and now in our soil.
So between the clay, the walnuts, and the lead, our soil could use some amending. Some potential solutions were:
-spread gobs . . . oodles . . . loads of compost and mix it in as we turn the soil
-build raised beds and fill them with purchased compost
 |
| Pesky black walnut hulls. |
One day while David was working in the garden last summer, the woman who owns many of the properties around us came out and chatted about the history of the area. He asked her what the deal was with the random rusty pole that's still standing in the middle of our garden because we've been finding huge rusty nails and other ancient-looking metal objects while digging around. She told us that the pole is all that is left of the Martin house her grandfather had in his yard many many years ago.
 |
| Yes. This is a picture of a pole. But this pole has a long history, apparently. And it's also likely dispensing lead into our soil :( |
So between the clay, the walnuts, and the lead, our soil could use some amending. Some potential solutions were:
-spread gobs . . . oodles . . . loads of compost and mix it in as we turn the soil
-build raised beds and fill them with purchased compost
-compost in place
I did some internet digging and heard from some friends that sheet mulching (or lasagna mulching, as it's sometimes called) is a way of composting in place that helps soil texture, moisture retention, and nutrient content, as well as keeping weeds down. Sounded pretty good to me! Plus we had a stock pile of some of the things we'd need to do it.
Sheet Mulching Recipe:
Bottom (Weed Block) Layer - Cardboard or newspaper
2nd (Organic) Layer - leaves, grass clippings, or other dry and weed-free material
3rd (Mulch) Layer - straw (not hay) or wood chips (if you're not planting vegetables)
4th (Compost) Layer - manure or mature compost to plant in
We laid out the cardboard which was harvested from the dumpster at the garden store and from our stock pile in the basement, making sure to overlap the edges about 6 inches so that weeds can't grow through the gaps. At this point we watered the cardboard reaaallly well, and then just layered away! Leaves, straw, compost and more water. We could have done another round of layering for a lasagna mulch, but one round was all we had materials for.
After about one week, the cardboard stayed nice and wet and was breaking down enough to stick your fingers right through it! We've now planted a few things so we'll see how they're able to bust through!
I did some internet digging and heard from some friends that sheet mulching (or lasagna mulching, as it's sometimes called) is a way of composting in place that helps soil texture, moisture retention, and nutrient content, as well as keeping weeds down. Sounded pretty good to me! Plus we had a stock pile of some of the things we'd need to do it.
Sheet Mulching Recipe:
Bottom (Weed Block) Layer - Cardboard or newspaper
2nd (Organic) Layer - leaves, grass clippings, or other dry and weed-free material
3rd (Mulch) Layer - straw (not hay) or wood chips (if you're not planting vegetables)
4th (Compost) Layer - manure or mature compost to plant in
We laid out the cardboard which was harvested from the dumpster at the garden store and from our stock pile in the basement, making sure to overlap the edges about 6 inches so that weeds can't grow through the gaps. At this point we watered the cardboard reaaallly well, and then just layered away! Leaves, straw, compost and more water. We could have done another round of layering for a lasagna mulch, but one round was all we had materials for.
 |
| Last year's garden before sheet mulching. |
 |
| Beds after sheet mulching. Yay for compost! |
No comments:
Post a Comment